Thursday, December 5, 2013

Peanut Butter Fudge

Sorry guys, I forgot to take a picture of it. The next time I make it, I'll be sure to snap a pic and add it!
This is super easy and only has 4 ingredients! And it is very very yummy!!!


Ingredients

8 ounces unsalted butter, plus more for greasing pan
1 cup smooth peanut butter
1 teaspoon vanilla extract
1 pound powdered sugar

Directions

Combine the butter and peanut butter in a 4-quart microwave-safe bowl and cover with plastic wrap.
 Microwave for 2 minutes on high. Stir and microwave on high for 2 more minutes.
 (Use caution when removing this mixture from the microwave, it will be very hot.) 
Add the vanilla and powdered sugar to the peanut butter mixture and stir to combine with a wooden spoon. 
The mixture will become hard to stir and lose its sheen. Spread into a buttered 8 by 8-inch pan lined with parchment paper. 
Fold the excess parchment paper so it covers the surface of the fudge and refrigerate until cool, about 2 hours. 
Cut into 1-inch pieces and store in an airtight container at room temperature for up to a week.

Friday, October 25, 2013

Chocolate Brownies with Peanut Butter Frosting

This was such a yummy thing to make! And both the brownies and frosting were delicious to eat by themselves and a fantastic pairing! And they are both super easy to make!! I could make the frosting every day and eat it all the time! So good!


Here are the brownies!

Ingredients:
1 cup of butter (I use stick butter)
1/2 cup of cocoa
2 cups of flour
2 cups of sugar
4 eggs
4 tsp Vanilla


Directions :

Preheat oven to 350 F.

Melt the butter in the microwave and put in mixing bowl. Add cocoa and mix together until smooth.

Add flour and sugar. Beat together. Texture will be very grainy. Add eggs and vanilla.
Mix until combined.

Pour into a greased 9x13 baking pan.

FYI, the batter will not be runny like a cake mix. You might need to use a spatula and spread it out over the pan.

Bake for 20 minutes at 350 F.


AND NOW FOR THE BEST!

Peanut Butter Frosting!!!

Ingredients :
1 cup creamy peanut butter
1/4 cup salted butter, at room temperature
2-3 cups confectioners' sugar
up to 1/4 cup heavy cream or whole milk
1/2 teaspoon vanilla extract

Directions :

  • Beat peanut butter and butter together on medium speed until creamy and well combined. Beat in vanilla.
  • Add confectioners sugar a cup at a time alternating with a tablespoon of heavy cream until it reaches a spreadable consistency (not too thin or thick, when you lift the beater it shouldn't drip right off). Beat 3-4 minutes longer on medium speed until light and fluffy. 

  • Thursday, September 12, 2013

    Homemade Funnel Cakes

    For my parents 21st anniversary dessert after dinner  I made home made funnel cakes! Mine didn't look like regular funnel cakes but they sure did taste amazing!


    Ingredients 

    1 tablespoon sugar
    1 teaspoon baking soda
    1 teaspoon salt
    2 cup all-purpose flour
    1 teaspoon vanilla
    1   egg, beaten
    2 cup milk
    1/2   (4 tablespoons) melted butter
    Powdered sugar, for topping

    Directions

    Combine milk, egg, and vanilla in a large bowl. In a separate bowl, combine flour, salt, baking soda, and sugar and gradually add to wet ingredients. Beat with a mixer until a smooth batter forms. Fold in melted butter. Pour batter into a funnel or squeeze bottle while using your index finger to stop the flow of the batter. Bring the funnel over the hot oil and release your finger to start a stream of batter while moving the funnel in a circular motion to create spiral-like shapes. Fry for 2 to 3 minutes until golden brown and slightly puffed. Sprinkle with powdered sugar.

    Sunday, August 18, 2013

    Buffalo Chicken Crescent Loaf


    • Buffalo Chicken Crescent Loaf (Or Wreath, depending on the shape you make it.)


      Ingredients!

    • 8 ounces cream cheese, softened
    • 1 packet ranch dressing mix
    • 1/2 cup celery, finely diced
    • 1/2 cup onions, finely diced
    • 1/2 cup Buffalo sauce
    • 2 (6 ounce) packets cooked chicken, very finely diced
    • 2 tubes crescent rolls
    • 1/2 cup ranch dressing (for dipping), optional

    Directions!

    1. 1Preheat oven to 375 degrees. In a large bowl, combine cream cheese, ranch dressing mix, celery, onions, Buffalo sauce, and chicken. (Or, if you'd rather, mix it all together in a food processor.)
    2. 2Open the tubes of crescent rolls and separate each roll into four rectangles. Lay the rectangles on a parchment lined or nonstick baking sheet to form a loaf (I used a Celebrating Home Hospitality tray found here  http://www.celebratinghome.com/sites/bekakopenski/PWPShowProduct.ashx?ProgramProductId=2466&ProgramCategoryId=86
    3. (Link is already ready to use to buy through me! So take a look around, shoot me an email with any questions. We have some amazing products, including awesome candles and the best Bean Pot ever!)
    4. 3Spoon chicken mixture into the center of the crescent dough ring. Fold the top of each crescent dough rectangle over the chicken filling, pressing into place to secure the dough all the way around the filling.
    5. 4Bake in preheated oven at 375 degrees for 15-20 minutes, or until golden brown. Allow to cool slightly before serving. Garnish with chopped scallions, cilantro, or other herbs, if desired.
     I noticed when we all dug into it that it was still a little doughy. I suggest adding 5-10 more minutes (if using a Celebrating Home stoneware item). Should work find on a regular metal sheet.

    Served great with ranch!


    If you haven't yet, show some support and follow my blog! And while you are at it, check out my other recipes.
    Pin away!


    Friday, June 14, 2013

    Cold Brewed Coffee

    Great for iced coffee!

    The recipe I used called for a whole cup of coffee grinds for a quart sized mason jar. I tried again using 1/2 cup (both times added more water after I took the grinds out). I think a whole cup was too much but 1/2 cup wasn't enough.
    So, whatever your preference, do it!
    Put the grinds in the bottom of a quart sized mason jar, add water. Mix with a fork until all grounds are mixed well with the water. Seal jar up and place in fridge for 8-12 hours, over night.

    Then in the morning, when you are ready and have time, this is how I took the grinds out.

    I used cheese cloth, placed over a funnel over a large cup. Then I poured the coffee grind/water into it.

    Then you have your cold brewed coffee! Stays good for up to a month!

    Fill cup with ice, add coffee.


    Then add sugar and creamer (if you so desire)


    Stir together and enjoy some yummy coffee!!!


    Don't forget to subscribe!!!


    Or comment/ share below!


    Amish White Bread Recipe

    Amish White Bread Recipe


    Some of the yummiest bread I have ever eaten. Perfect toasted and buttered (stick butter). Just yummy!

    2 cups warm water
    2/3 cups white sugar
    1 1/2 tbsp active dry yeast
    1 1/2 tsp salt
    1/4 cup vegetable oil
    6 cups bread flour

    Directions
    In a large bowl, dissolve the sugar in warm water, and then stir in yeast. Allow to proof until yeast resembles a creamy foam.


    Mix salt and oil into the yeast. Mix in flour one cup at a time. Knead dough on a lightly floured surface until smooth. Place in a well oiled bowl, and turn dough to coat. Cover with a damp cloth. Allow to rise until doubled in bulk, about 1 hour.


    Punch dough down. Knead for a few minutes, and divide in half. Shape into loaves, and place into two well oiled 9x5 inch loaf pans. Allow to rise for 30 minutes, or until dough has risen 1 inch above pans.


    Bake at 350 degrees F  for 30 minutes.

    Enjoy!!!!!

    Monday, April 29, 2013

    Cheese stuffed meatballs (AMAZING!)

           Cheese Stuffed Meatballs and Spaghetti 

    4 sticks of Mozzarella string cheese
    1/2 cup Italian style bread crumbs
    1 jar (48 oz) Sauce
    1 to 1 1/2 lb of ground beef ( I used one lb)
    a few shakes of garlic powder
    1/2 tsp of salt
    1/2 tsp of dried oregano leaves
    1 egg
    One box of spaghetti noodles ( I personally love angel hair)
    Parmesan cheese (optional)


    Step One
    Cut string cheese into cubes 3/4 inch long. Freeze in sandwhich bag for one hour.

    Step Two

    Heat oven to 375 degrees F. Line your pan with foil. In large bowl, mix bread crumbs, 3 Tbsp of the sauce, ground beef, garlic powder, salt, oregano and egg together. Shape mixture into around 20 balls, (this # doesn't have to be perfect. Just make them nice sizes). What I did was press one at a time, flat, then placed a cheese cube into it and folded the meat around it and rolled it in my hands until it was a ball again.
    Place meatballs in pan. Bake for 20-30 minutes (uncovered).
    Psh. The recipe I got this from (and tweaked) said bake for 10 minutes... psh yea not done until 20 or 30 minutes passed. Stupid recipe. lol

    Step Three
    Prepare the rest of your pasta sauce and pasta (in the way you are most comfortable).
    Then you are done :)

    Enjoy!

    If you haven't already, please subscribe!


    Friday, April 26, 2013

    Frozen Peanut Butter Cheesecake

    Frozen Peanut Butter Cheesecake


    Ingredients

    6 tablespoons butter
    1 1/2 cups semi-sweet chocolate chips
    2 1/2 cups crispy rice cereal
    1 (8 ounce) package cream cheese, softened
    1 cup sweetened condensed milk
    3/4 cup creamy peanut butter
    1 teaspoon vanilla
    2 tablespoons lemon juice
    1 cup frozen whipped topping, thawed
    2 tablespoons hot fudge sauce
    2 tablespoons creamy peanut butter

    Directions

     
    (this is super yummy to eat when it's warm and still "wet" lol

    1. In a medium microwave safe bowl, melt butter and chocolate chips in the microwave for about a minute or until melted. Stir together until combined. Add crispy rice cereal and stir well to coat.

    2. Press into the bottom and up the sides of a 9-inch springform pan. You could use a pie pan but I've found that a springform pan is much easier when it comes to removing slices. Place in the freezer to chill while you make the filling (about 10 minutes).

    3. In a large bowl beat cream cheese until fluffy. Add the sweetened condensed milk and peanut butter and mix until thoroughly combined.
    4. Add vanilla and lemon juice and mix until combined.
    5. Gently fold in the whipped topping. Pour filling into the prepared crust.
    6. Heat fudge and peanut butter in two small separate bowls for 20-30 seconds or until warm. Drizzle over filling.

    7. Freeze for 4-6 hours or until pie is firm. Remove the cheesecake from the freezer about 10 minutes before serving to make cutting easier. Garnish with peanut butter and chocolate candy bars.


    Made this yesterday for my dad's 43rd birthday. Had my family and two other families meet at the park for a surprise picnic dinner. Everyone loved it! This cheesecake is amazing! Though, honestly, I'd have to say that the crust was off. It was SUPER hard to cut (duh, it was frozen for like 4-6 hours). And I only had a plastic knife to use. Even broke a plastic fork trying to cut it. I think next time, a graham cracker crust will be just fine, if not better. But it was all still great! I used a total of 43 mini resees cups (outlined the pan in the pic above and used the rest to write out the numbers 43).  It was a great dessert!!!!!

    Wednesday, March 6, 2013

    Four layer Chocolate and Strawberry Buttercream cake


    I got this wonderfully delicious recipe from Pinterest from 'Sweetapolita'. Her cake was six layers and it was dark chocolate.
    This was my first professional-like cake. And my first layered cake. I think it turned out rather awesome!
    Included is Sweetapolita's recipe and my pictures. I added a couple notes that are in purple wording.


    Six-Layer Dark Chocolate & Strawberry Buttercream Cake
    Yield: One 6-layer, 6-inch round cake

    Ingredients

    For the Cake:
    1-1/2 cups (180 g) all-purpose flour
    1-1/3 cups (275 g) sugar
    1/2 cup (60 g) dark cocoa powder (Or regular cocoa powder, it tastes just fine)
    1-1/4 teaspoons (6 g) baking soda
    1-1/4 teaspoons (6 g) baking powder
    1 teaspoon (5 g) salt
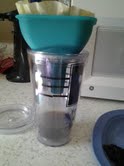
    140 ml (5 liquid oz) buttermilk
    130 ml (4.5 liquid oz) espresso or strong, hot brewed coffee
    75 ml vegetable oil
    2 eggs, room temperature, lightly beaten
    1 tablespoon (15 ml) pure vanilla extract

    For the Strawberry Swiss Meringue Buttercream:
    5 large, fresh egg whites (150 g)
    1-1/4 cups (250 g) sugar
    1-1/2 cups (3 sticks)(340 g) butter, cut into cubes and cool, but not cold
    2 teaspoons (10 ml) pure vanilla extract
    1/4 cup (59 ml)(or to taste) strawberry puree OR a handful (about 1 cup, or more to taste) of fresh, washed, and dried strawberries, chopped
    pinch of salt
    few drops pink food coloring (optional) (I used it to enhance the color, and I used Pink food coloring, not red, I got it from Kroger)

    For the Glaze:
    4 oz (115 g) high quality bittersweet chocolate, coarsely chopped or callets
    1/3 cup (76 g) unsalted butter, at room temperature and cut into cubes
    Instructions

    Insructions: 


    For the Cake:
    Preheat oven to 350° F (180°C). Prepare three 6-inch round cake pans with butter, parchment paper rounds, and flour or cocoa powder. Tap out excess.
    In bowl of electric mixer, sift all dry ingredients.
    Add all remaining ingredients to bowl with the dry ingredients and with paddle attachment on mixer, mix for 2 minutes on medium speed (you may need the plastic splash-guard that comes with mixer) and pour into prepared pans. If possible, use digital kitchen scale and weigh pans for even layers. Batter will be liquidy.
    Bake for 20 minutes and rotate pans in oven. Cakes are done when toothpick or skewer comes out with a few crumbs, about 30 minutes total. Try not to over-bake.
    Cool on wire racks for 20 minutes then gently invert onto racks until completely cool.

    For the Strawberry Swiss Meringue Buttercream:
    If using strawberry puree, place a handful of frozen strawberries in a food processor,
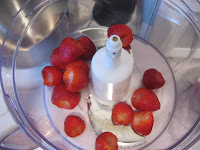
    and process until a smooth puree. Measure approximately 1/4 cup and set aside (you may want to add more puree to taste).
    Wipe the bowl of an electric mixer with paper towel and lemon juice, to remove any trace of grease. Add egg whites and sugar, and simmer over a pot of water (not boiling), whisking constantly but gently, until temperature reaches 160°F, or if you don't have a candy thermometer, until the sugar has completely dissolved and the egg whites are hot.
    With whisk attachment of mixer, begin to whip until the meringue is thick, glossy, and the bottom of the bowl feels neutral to the touch (this can take up to 10 minutes or so). *Don't begin adding butter until the bottom of the bowl feels neutral, and not warm.
    Switch over to paddle attachment and, with mixer on low speed, add butter cubes, one at a time, until incorporated, and mix until it has reached a silky smooth texture (if curdles, keep mixing and it will come back to smooth). *If mixture is too runny, refrigerate for about 15 minutes and continue mixing with paddle attachment until it comes together. Add vanilla and salt, continuing to beat on low speed until well combined.
    Add strawberry puree to taste or the finely chopped strawberries, and blend until combined. Add small amount of pink food coloring, if desired. 
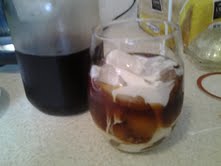
(I think mine curdled. It never was a silky smooth texture but it still worked. The pic of the white stuff is the egg white/sugar mixture after all the butter was added to it. you can tell that it is not silky smooth.)

    For the Glaze:
    Place the chocolate and butter in a medium heatproof bowl over a pot of simmering water. Stir the mixture using a rubber spatula until melted and smooth. *Be careful to not get even a droplet of water into your bowl of chocolate and butter.

    Assembly of the Six-Layer Dark Chocolate & Strawberry Buttercream Cake
    Slice the 1st cake layer in half horizontally, using a large serrated knife and place cut side up on your cake board, pedestal, or plate.
    Using a small offset palette knife, spread approximately 1/2 cup of buttercream evenly on the top.
    Repeat this with remaining cake layers, until you come to the final layer, which you will place face-down on the top of the cake.
    Place cake on a turntable (if possible), and using a small offset palette knife for the top of the cake, and medium straight palette knife for the sides, cover the cake in a thin layer of buttercream to seal in crumbs. Refrigerate for 30 minutes (or more). *This does not need to be perfect, as that will come with the top "coat" of buttercream.

    Repeat the previous step and for best results, use bench scraper held at 90° against the side of the cake, slowly turning the turntable and keeping your hand steady--let the turntable do the work. Clean up edges with your small offset palette knife.
    Chill cake.


    If glazing the cake, make the glaze and set aside for a few moments to cool a bit. Pour glaze over chilled cake, smoothing the top with a clean small offset palette knife.

    Chill again to set.
    *Bring to room temperature before serving--about 2+ hours. Never serve Swiss Meringue Buttercream until it is soft and room temperature.


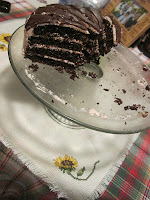
     The finished slice. Look how pretty :)

    If you haven't subscribed, please do so now! Help me out! Thanks!

    Roast Chicken


     This Roast Chicken would make Samwise proud !


    Now, for this perfectly, near heavenly Roast Chicken, you will need a Celebrating Home Bean Pot. And I will include contact information of a Celebrating Home's Designer who would love to hook you up with an amazing Bean Pot. (Plus, they come in different colors/designs. Heck yea!)


                                                                        Roast Chicken

    • Preheat oven to 375 degrees F.
    • Once the oven is preheated : Put the whole chicken in the bean pot (take out innards first)
    • Pour 2 cups of water over chicken.


    • Pour entire bottle of Lemon Herb Marinade over the chicken.
    • Cover and bake for 1 hour and 30 minutes. After that, then take the lid off and bake it for 30 more minutes.


    (Pic above) is after it was finished baking. (Pic below) is when I took it out of the bean pot. It was so moist and juicy and heavenly that I almost could not get it out of the bean pot! It was just so awesome it fell apart at the touch!
    BAM!
    That is how you make amazing Roast Chicken! And such low maintenance too!


    I made a big mess with this chicken. It was the first time I had ever used a whole chicken before. How was I supposed to know there was so much blood involved? Eww! 


    Ok, here is the contact info on the bean pots and the designer who can hook you up!

    Nikki Kopenski
    nikki.kopenski@gmail.com

    And here is a link to a picture and product description of the bean pot.

    http://www.celebratinghome.com/GeneralProductDetail.ashx?ProgramProductId=7787


    As always, if you haven't already, please subscribe now! Thanks!


    Wednesday, January 23, 2013

    Home made corn bread muffins


    Homemade Cornbread muffins

    1 cup flour
    3/4 cup cornmeal (white)
    1/2 cup sugar
    2 1/2 tsp baking powder
    3/4 tsp salt
    2 eggs (beaten)
    1 cup of milk
    1/4 cup cooking oil  (I used veg.)

    Preheat oven to 400 degrees F.

    Step 1 : In a medium bowl (or Kitchen Aid Stand Mixer bowl) stir together flour, cornmeal, sugar, baking powder and salt. Set aside.

    Step 2 : In a small bowl, combine egg, milk and oil. Beat together till mixed thoroughly.  Add egg mixture all at once to flour mixture. Stir (for KASM I set it on the lowest setting until mixed). Spoon  batter into 12 muffin cups. Bake at 400 degrees F. for 15-19 minutes (I think I cooked mine for about 18/19 minutes.) until lightly browned and inserting a knife and comes up clean.
    Makes 12.

    Thursday, January 17, 2013

    Home made refried beans


    Home made Refried beans

    What you need:
    1 (15.5oz) can of Goya Pinto Beans


    1 Tbsp. vegetable oil
    1/4 small onion, chopped
    1 clove garlic, minced
    2 Tbsp. cheese of choice
    Salt and Pepper to taste

    In a medium bowl, mash beans. Cook the garlic and onion in the oil in am edium skillet on medium heat until soft. Add the beans, salt and pepper to skillet. Cook, stirring often, until bean liquid starts to evaporate. reduce heat and simmer till desired consistency-about five minutes. serve with cheese sprinkled on top (optional). 


    This was really good and that is coming from a girl who doesn't like refried beans!


    Tuesday, January 8, 2013

    Homemade Cherry Cordials

    So I remember Christmas' growing up and how my papa got at least one box of Queen Anne's Chocolate Cherry Cordials. He loves them! So this past Christmas season, when I came across this recipe, I had to make them for him.
    And I was super nervous about it because it was my first time and I had to let them turn cordial for TWO weeks! So I had to wait and wonder if they were ok for two weeks! Insane! haha
    But it was worth the wait. Everyone raved :) And too see the smile on my Papa's face :)

    So here you go! Very easy to make just make sure you have a good storage place...That was the worst part - storing them for two weeks in a cool place (not a refrigerator ugh)

    And the pictures are of my own cherry cordials!


    CHERRY CORDIALS
    adapted from cooks.com and this recipe
    2 (10-oz) jars maraschino cherries (you’ll need 40-50)
    ¼ c butter, softened
    2 ¼ c powdered sugar
    1 T reserved cherry juice
    ½ t vanilla extract
    ¼ t almond extract
    1 (12-oz) bag semi-sweet chocolate chips
    ¼ cake paraffin wax, shredded OR 2 T vegetable shortening
    Drain the cherries, reserving the juice. Shake them out well in the colander (do not rinse) and then place them on a double layer of paper towels to dry. Place a paper towel on top and roll your hands around on top of it to help dry them off. Leave them on the paper towel (replacing if it is very wet) while you prepare the fondant.
    Cream the butter with 1 cup of the powdered sugar, then add 1 T reserved cherry juice, the extracts, and the remaining sugar; stir until mixed. You may have to knead it with your hands as it will be firm like dough.
    Line a baking sheet with wax paper. Take small pieces of fondant, about 1 or 2 teaspoons, and press them flat on your palm. Wrap around the cherries, pinching off the excess before rolling them smooth and placing on the wax paper. Repeat until all cherries are covered with the fondant. Set in the freezer until well chilled. I did this step a day in advance and proceeded with the dipping the following day, so they were frozen hard.
    Melt the chocolate chips and shredded paraffin or shortening until smooth. Dip each cherry in the chocolate using a fork, drawing fork across rim of pan to remove excess coating. Drop coated cherry upside down onto waxed paper, swirling a thread of coating from fork across top for a decorative touch (after a while, I used my finger instead to swirl the chocolate on top).  Once all are coated, place in the refrigerator until the chocolate is set; check bottoms and reseal with additional melted coating, if necessary. You want every part of the center covered or it will start to leak out as it liquefies.  Store in a cool place (do not refrigerate) for 2 weeks to form cordial.
    So below are some notes by the original person I got the recipe from so I thought I'd add them along since they were of a great help to me when  I made my cherries!
    Notes: Using the cherry juice makes a pink center.  If you want it to be white, just use milk instead of the juice.  
    *Update: the centers got softer but never completely liquefied before they were devoured. I dried the cherries extremely well, and I believe leaving them a little damp would allow the centers to better liquefy.
    *Update 2/9/11: I made these again, this time only draining the cherries and not drying them at all.  I also made the fondant softer, using “Best Life Buttery Spread” in place of the butter b/c I was *gasp* out of butter.  It was quite soft when I wrapped it around the cherries.  I froze the wrapped cherries for two days before I had time to dip them and after dipping, the centers were already starting to liquefy after a few days.  It has now been a week and they are about 50 % clear centers.  I’m thinking in another week they’ll be completely liquid!
    *Update 2/14/11: today the centers are about 50% liquified, but the liquid isn’t clear–it’s red!  To make sure your own centers liquify, I’d suggest not drying them at all, just draining the cherries, and adding less sugar or more liquid to the fondant so that it’s quite soft when you wrap it around the cherries.


     A night or so before Christmas I had my dad try one because I couldn't wait any longer. I made sure he bit into half of it so you can see how it was close to liquidation. (if that is the correct term. haha)